The post Rosenstein Fashion & Beauty Blogger Template Documentation appeared first on Beautiful Feminine Blogger Templates for Women.
]]>First of all, Thank you for Downloading our template if you haven’t done yet you can get it from here: Rosenstein Fashion & Beauty Blogger Template. You check the live demo through the button below and also Please Read this documentation carefully in order to set up your blog and please note that there’s no support for free users.
1. Installation
Open your purchase folder, you will see a file with the name Rosenstein-(Free or Premium)-Version.xml
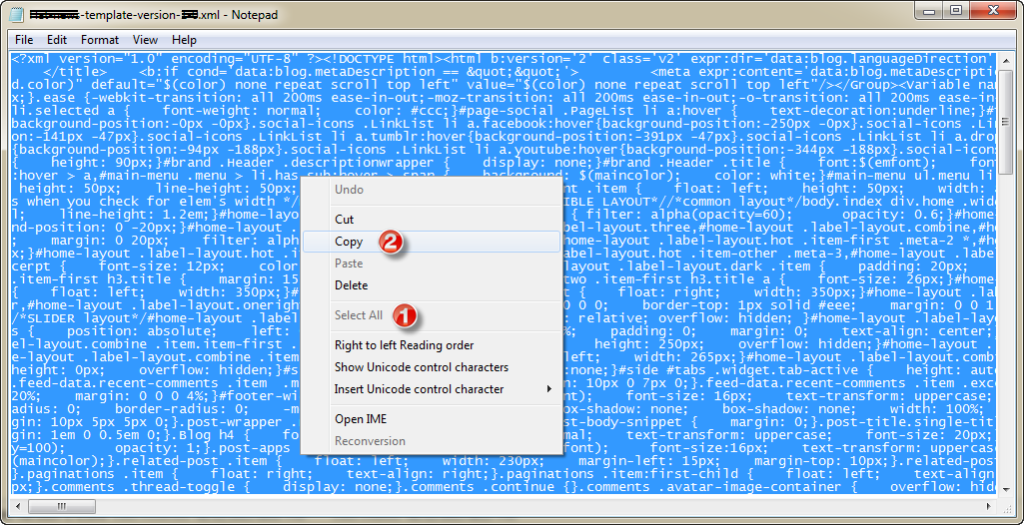
Open this XML file with a text editor (Notepad or something like that). Then select all text and copy (Ctrl+A, Ctrl+C in Window).
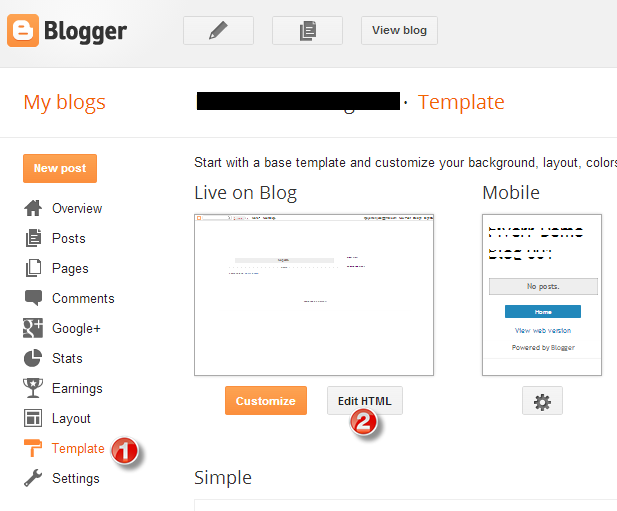
Return to your blog dashboard, access your Template menu, click Edit HTML
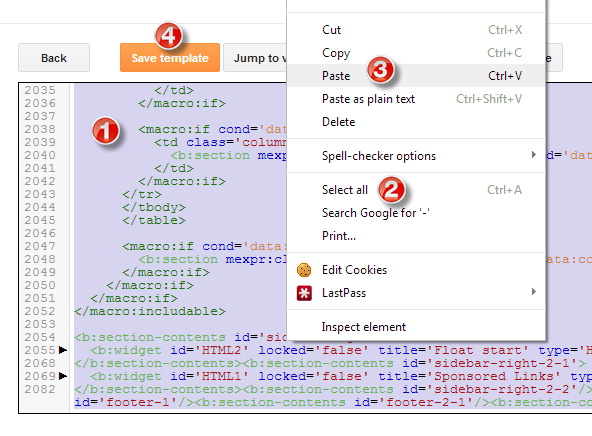
In Editor HTML window, select all old code and paste the new code that you copied from the release file into code field. Then, click Save template.
Video Guide : –
2. Main Menu

- To Edit Top Menu in this theme you can follow this step:
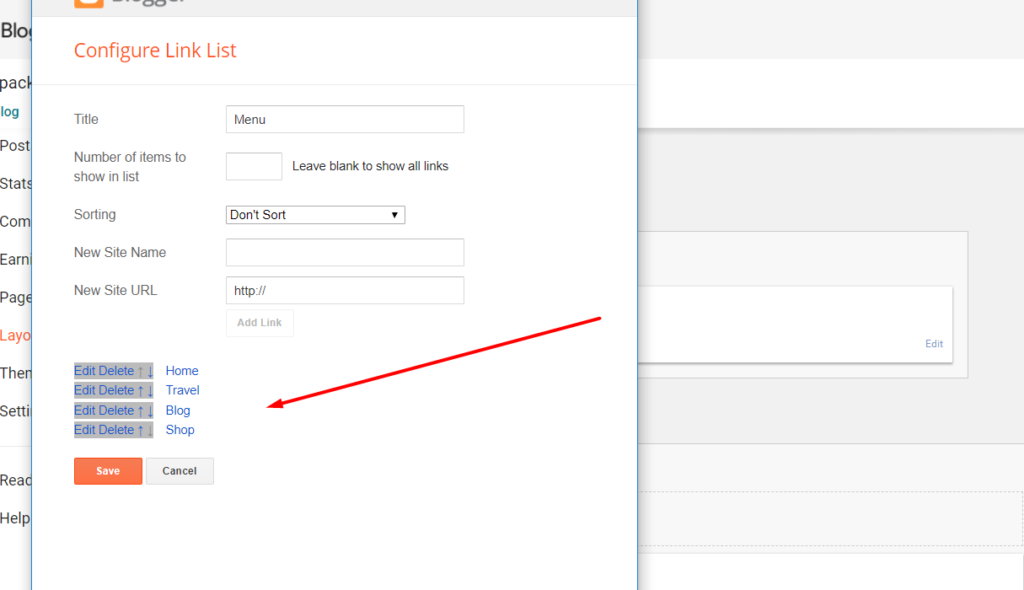
1. Go to -> Blogger Dashboard- >layout -> Main Menu- > press edit button.

- On Blogger Dashboard Click Layout.
- Click Edit on Top Navigation Widget.
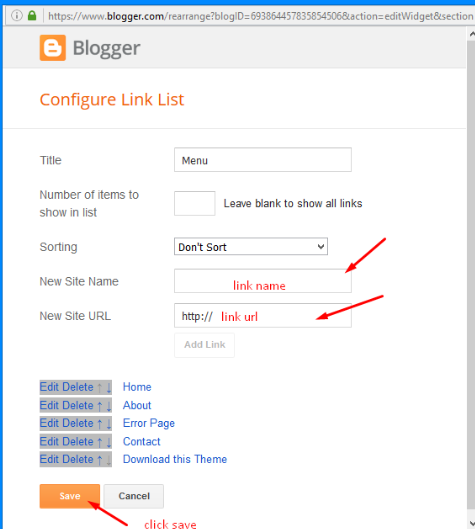
- Change it according to your needs. Add name of the link Name and link url then click add Link
- Click Save.
- Change the location of menu item using arrow down and arrow up Icon
- For More Information- Watch Video Below
Save it.
3. Social Top / Social Footer
To Edit Social icons in this theme you can follow these steps:
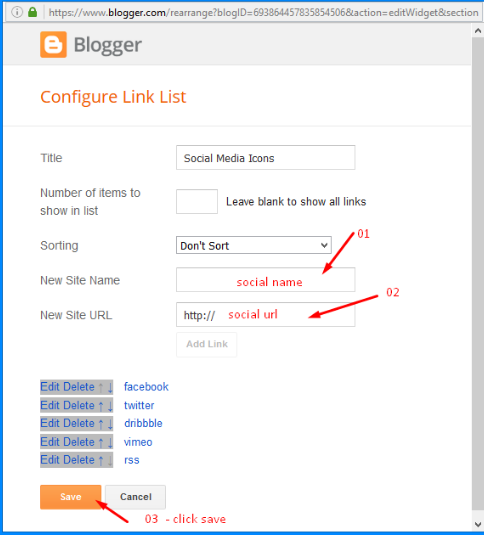
Add your social media name and link >> ADD LINK >> Once you added all the links SAVE.

Use http:// or https:// where applicable.
AVAILABLE ICONS:
Behance Facebook Twitter Bloglovin Dribbble Flickr GooglePlus Instagram Linkedin Pinterest Vimeo Youtube Vine Soundcloud Goodreads Deviantart Foursquare Reddit Tumblr Spotify Twitch Vk Mailto shop Rss Etsy
Video Guide : –
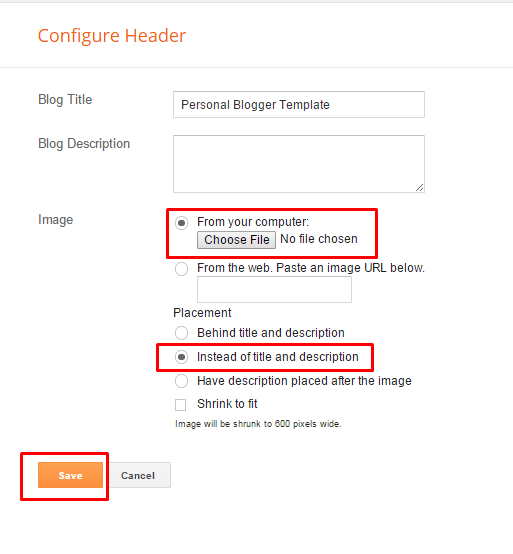
4. Logo Setup
1. In your dashboard Select “Layout”.
2. Upload Your Logo Header : In You Blog (Header), Click on “Edit” and applicate all settings below :
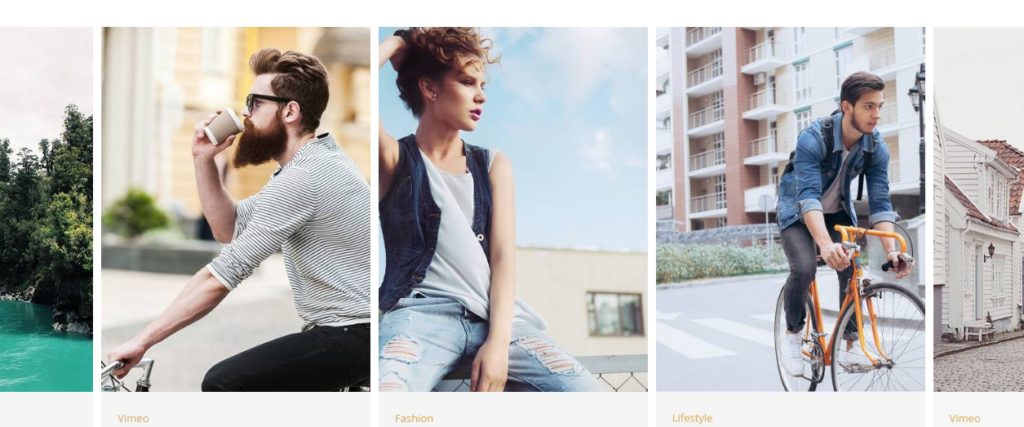
5. Intro Post
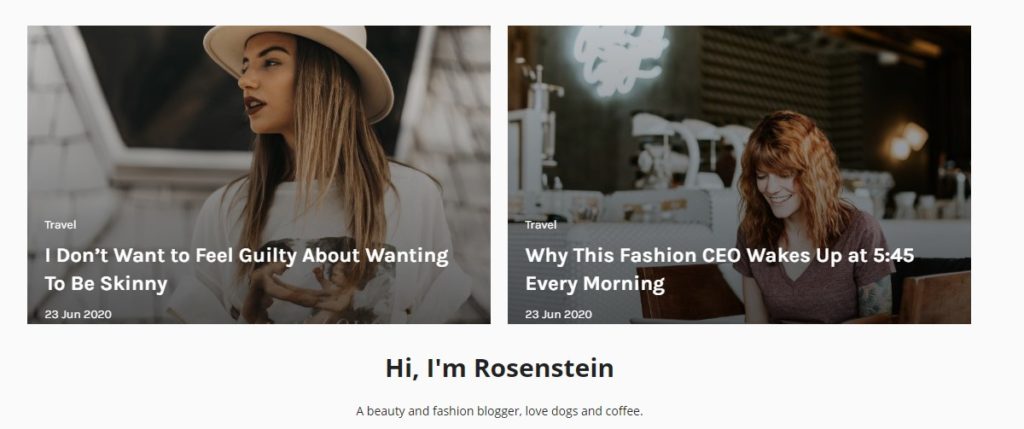
1. In your dashboard Select “Layout”.
2. Upload Your Intro Posts : In You Blog (Header), Click on “Edit” and applicate all settings below :

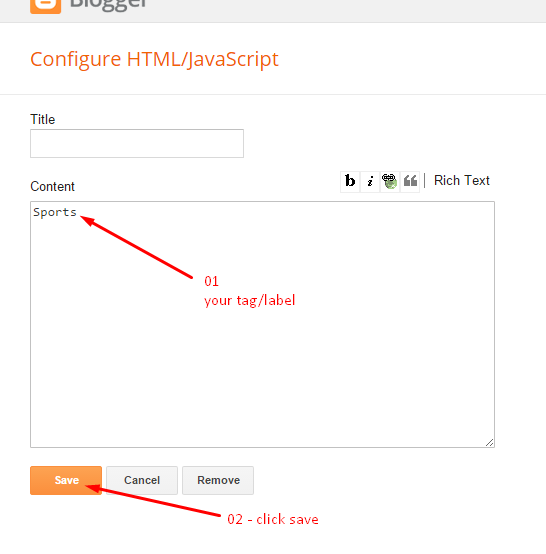
Put your label in the widget.
Done.
6. Bottom Intro Posts
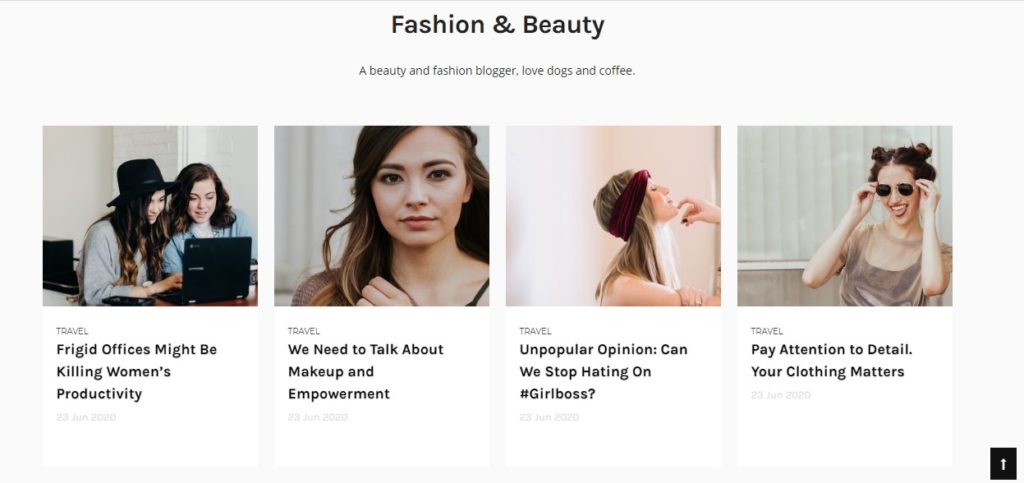
1. In your dashboard Select “Layout”.
2. Upload Your Intro Posts : In You Blog (Header), Click on “Edit” and applicate all settings below :
Put your label in the widget.
Done.
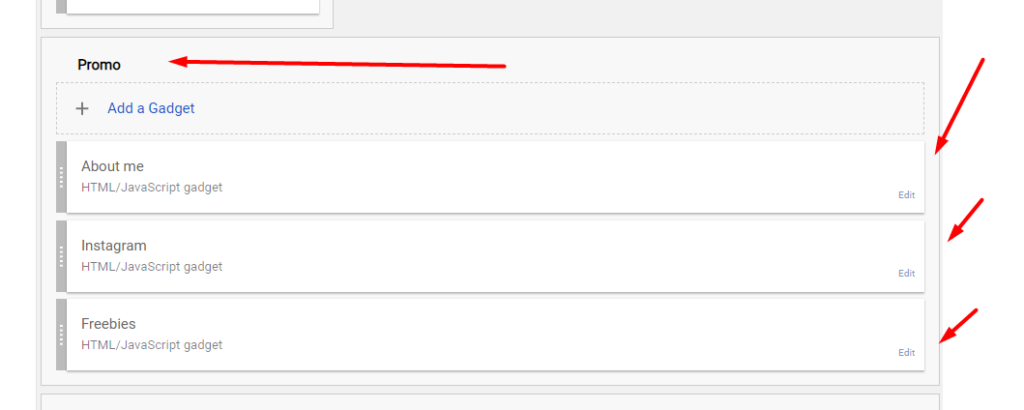
7. Setup the Promo.
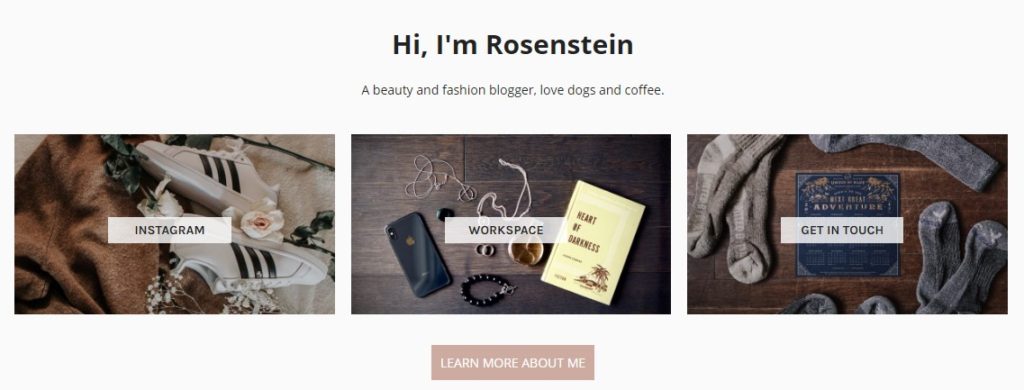
Now copy and paste the below mention code to widget content, replace the “/” with your link to your categories.
8. Mobile Version ( Responsive Design Option )
Mobile Responsive
After you apply mobile version for this template, Color changing option will not work. This is official bug of Blogger. So, please make sure, you used Color changing option before do this step.
As default, Blogger will use its own template for you blog on mobile. So if you want to use Fashion template on mobile devices, please enable it first.
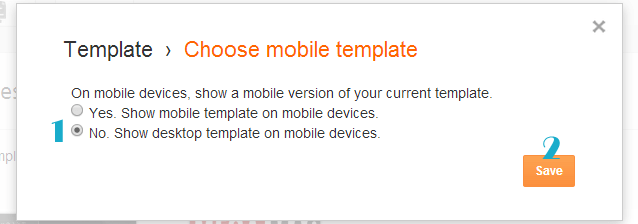
Access your Template menu and click on Gear button of Mobile template.
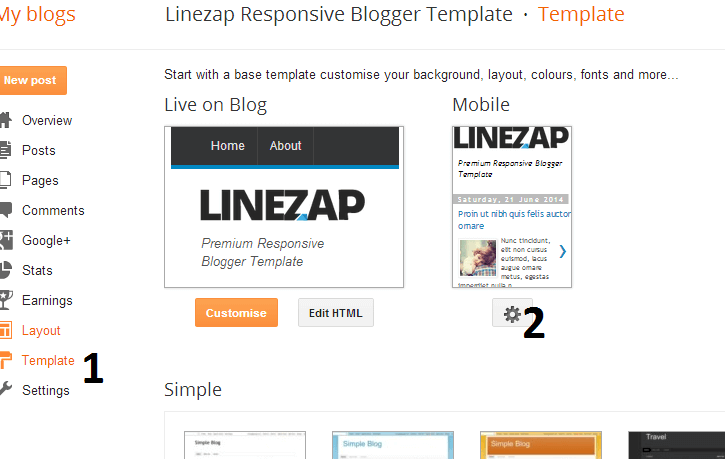
In Choose mobile template window, check “No. Show desktop template on mobile devices.” option, then click Save button.

The post Rosenstein Fashion & Beauty Blogger Template Documentation appeared first on Beautiful Feminine Blogger Templates for Women.
]]>The post Sophia Lifestyle Blogger Template Documentation appeared first on Beautiful Feminine Blogger Templates for Women.
]]>First of all, Thank you for Downloading our template if you haven’t done yet you can get it from here: Sophia Lifestyle Blogger Template. You check the live demo through the button below and also Please Read this documentation carefully in order to set up your blog and please note that there’s no support for free users.
1. Installation
Open your purchase folder, you will see a file with the name Sophia-(Free or Premium)-Version.xml
Open this XML file with a text editor (Notepad or something like that). Then select all text and copy (Ctrl+A, Ctrl+C in Window).
Return to your blog dashboard, access your Template menu, click Edit HTML
In Editor HTML window, select all old code and paste the new code that you copied from the release file into code field. Then, click Save template.
Video Guide : –
2. Main Menu

- To Edit Top Menu in this theme you can follow this step:
1. Go to -> Blogger Dashboard- >layout -> Main Menu- > press edit button.
- On Blogger Dashboard Click Layout.
- Click Edit on Top Navigation Widget.
- Change it according to your needs. Add name of the link Name and link url then click add Link
- Click Save.
- Change the location of menu item using arrow down and arrow up Icon
- For More Information- Watch Video Below
Save it.
3. Social Top / Social Footer
To Edit Social icons in this theme you can follow these steps:
Add your social media name and link >> ADD LINK >> Once you added all the links SAVE.
Use http:// or https:// where applicable.
AVAILABLE ICONS:
Behance Facebook Twitter Bloglovin Dribbble Flickr GooglePlus Instagram Linkedin Pinterest Vimeo Youtube Vine Soundcloud Goodreads Deviantart Foursquare Reddit Tumblr Spotify Twitch Vk Mailto shop Rss Etsy
Video Guide : –
4. Logo Setup
1. In your dashboard Select “Layout”.
2. Upload Your Logo Header : In You Blog (Header), Click on “Edit” and applicate all settings below :
5. Intro Post
1. In your dashboard Select “Layout”.
2. Upload Your Intro Posts : In You Blog (Header), Click on “Edit” and applicate all settings below :
Put your label in the widget.
Done.
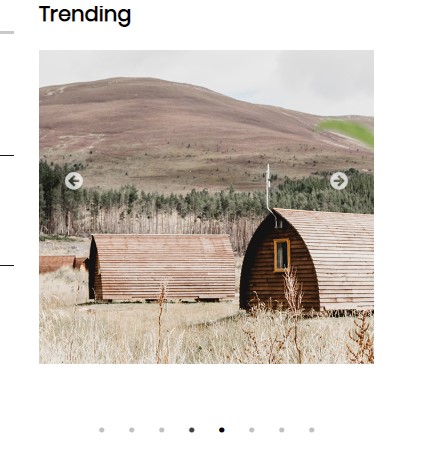
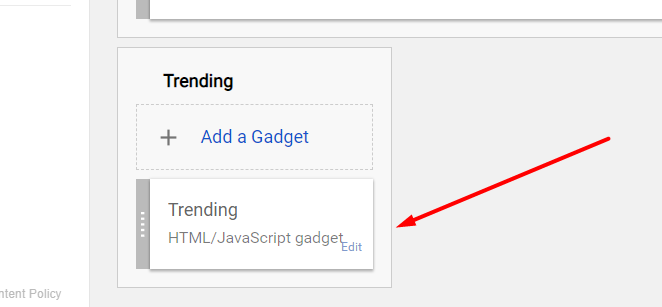
6. Trending
1. In your dashboard Select “Layout”.
2. Upload Your Trending : In You Blog (Header), Click on “Edit” and applicate all settings below :
Put your label in the widget.
Done.
7. Search Box
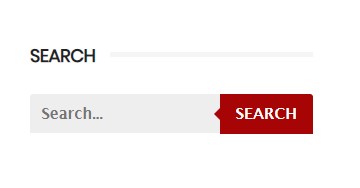
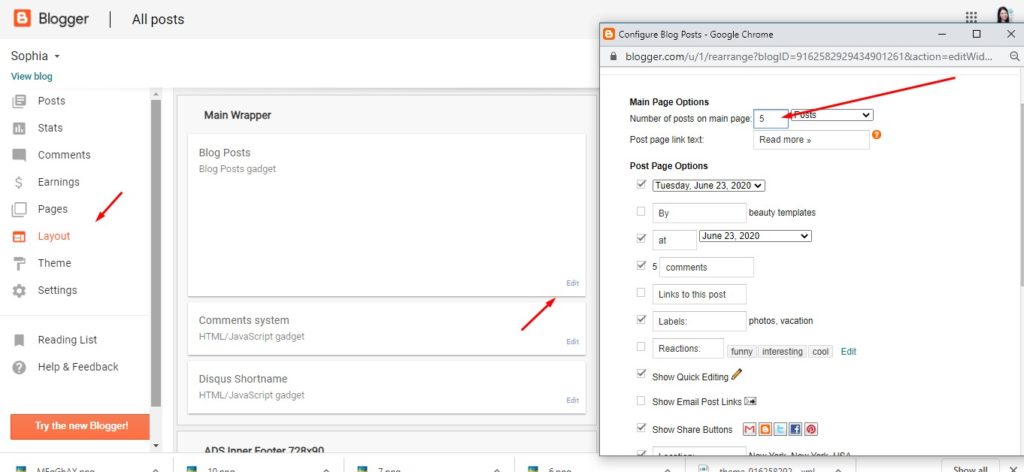
1. In your dashboard Select “Layout”.
2. Search : In You Blog (Header), Click on “Edit” and applicate all settings below :
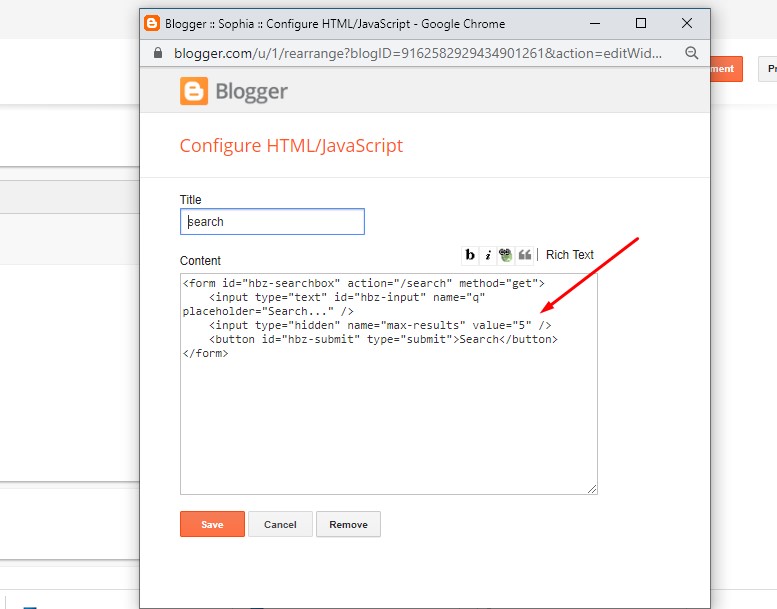
Now change the Value with like in the example 5 with same number of posts you want to display on the home page.
8. Instagram

Access your blog Layout > click Add a Gadget > HTML/JavaScript on Sidebar or Footer section, you must place the following names highlighted in blue below.
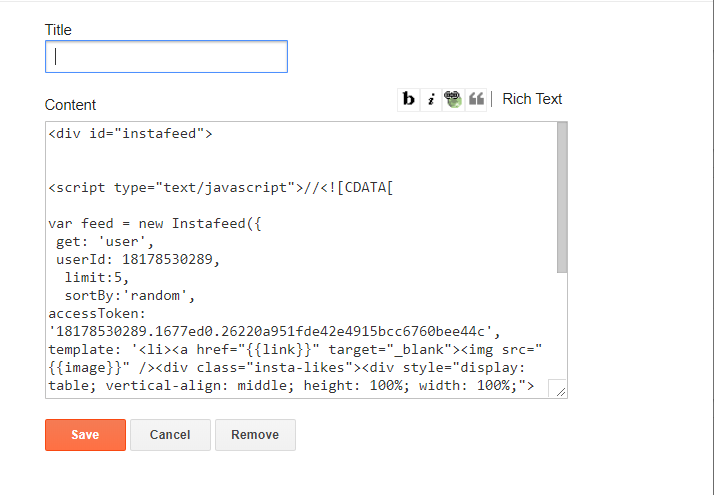
<div id=”instafeed”>
<script type=”text/javascript”>//<![CDATA[
var feed = new Instafeed({
get: ‘user’,
userId: 18178530289,
limit:5,
sortBy:’random’,
accessToken: ‘18178530289.1677ed0.26220a951fde42e4915bcc6760bee44c’,
template: ‘<li><a href=”{{link}}” target=”_blank”><img src=”{{image}}” /><div class=”insta-likes”><div style=”display: table; vertical-align: middle; height: 100%; width: 100%;”><span style=”display: table-cell; vertical-align: middle; height: 100%; width: 100%;”>{{likes}} <i class=”fa fa-heart”></i><br/>{{comments}} <i class=”fa fa-comment”></i></span></div></div></a></li>’,
resolution: ‘standard_resolution’
});
feed.run();
//]]>
</script></div>
Done.
9. Mobile Version ( Responsive Design Option )
Mobile Responsive
After you apply mobile version for this template, Color changing option will not work. This is official bug of Blogger. So, please make sure, you used Color changing option before do this step.
As default, Blogger will use its own template for you blog on mobile. So if you want to use Fashion template on mobile devices, please enable it first.
Access your Template menu and click on Gear button of Mobile template.
In Choose mobile template window, check “No. Show desktop template on mobile devices.” option, then click Save button.
The post Sophia Lifestyle Blogger Template Documentation appeared first on Beautiful Feminine Blogger Templates for Women.
]]>The post Amara Fashion & Travel Blogger Template Documentation appeared first on Beautiful Feminine Blogger Templates for Women.
]]>First of all, Thank you for Downloading our template if you haven’t done yet you can get it from here: Amara Travel Blogger Template. You check the live demo through the button below and also Please Read this documentation carefully in order to set up your blog and please note that there’s no support for free users.
1. Installation
Open your purchase folder, you will see a file with the name Amara-(Free or Premium)-Version.xml
Open this XML file with a text editor (Notepad or something like that). Then select all text and copy (Ctrl+A, Ctrl+C in Window).
Return to your blog dashboard, access your Template menu, click Edit HTML
In Editor HTML window, select all old code and paste the new code that you copied from the release file into code field. Then, click Save template.
Video Guide : –
2. Main Menu

- To Edit Top Menu in this theme you can follow this step:
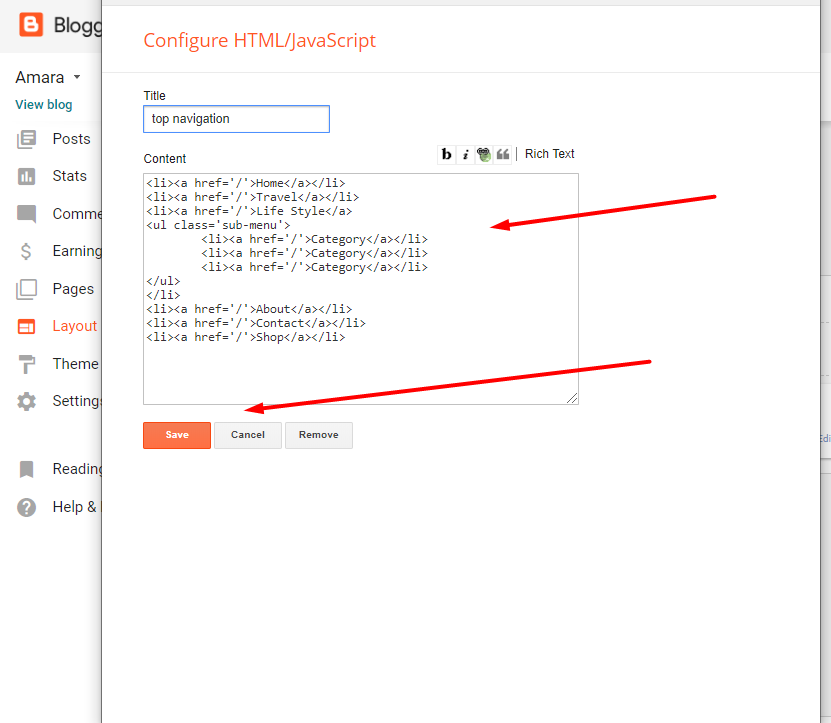
1. Go to -> Blogger Dashboard- >layout -> Top navigation- > press edit button.

2. Now copy and paste the below mention code to widget content, replace the “/” with your link to your categories.
Save it.
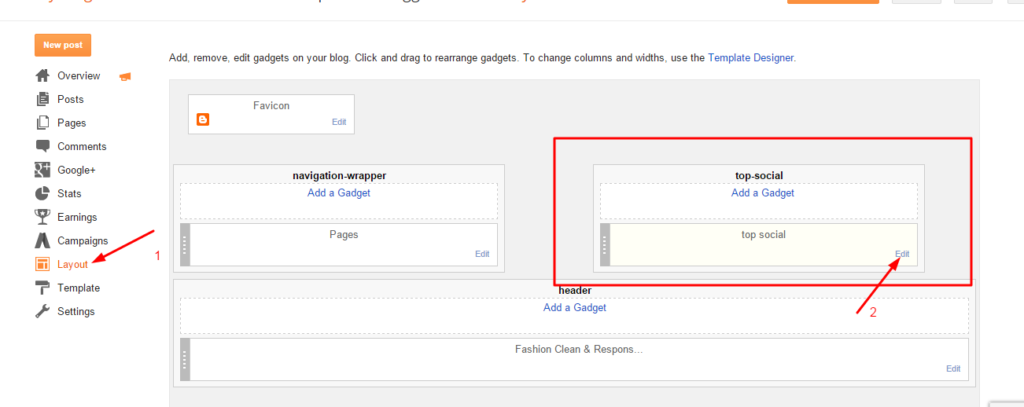
To Edit Sidebar Social icons in this theme you can follow these steps:
-
- On Blogger Dashbord Click Layout
- Top Social Widget Click Edit button

Add your social media name and link >> ADD LINK >> Once you added all the links SAVE.
Use http:// or https:// where applicable.
AVAILABLE ICONS:
Behance Facebook Twitter Bloglovin Dribbble Flickr GooglePlus Instagram Linkedin Pinterest Vimeo Youtube Vine Soundcloud Goodreads Deviantart Foursquare Reddit Tumblr Spotify Twitch Vk Mailto shop Rss Etsy
Video Guide : –
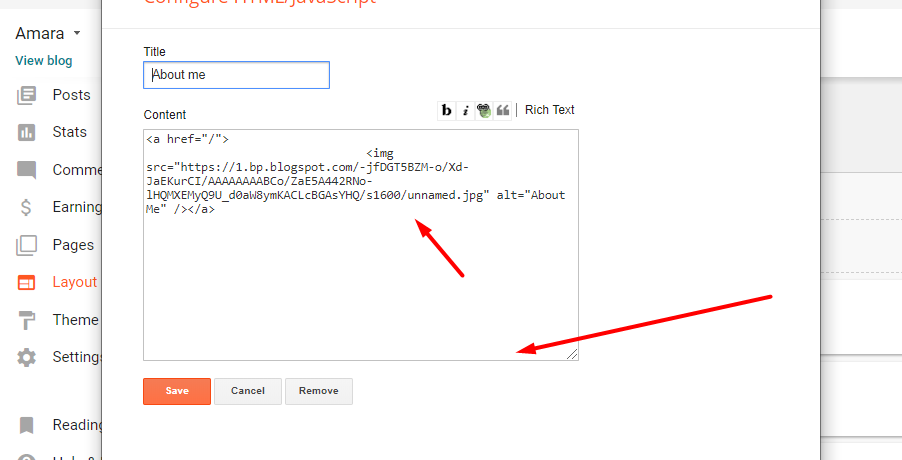
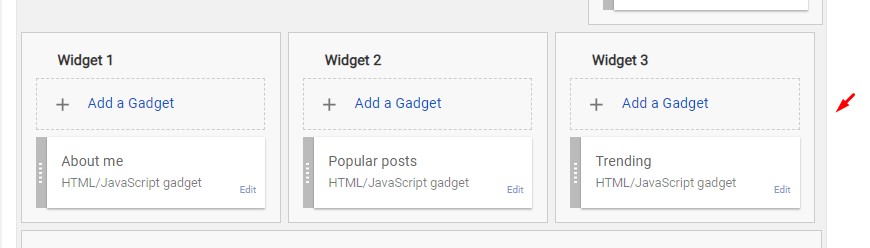
4. Widget
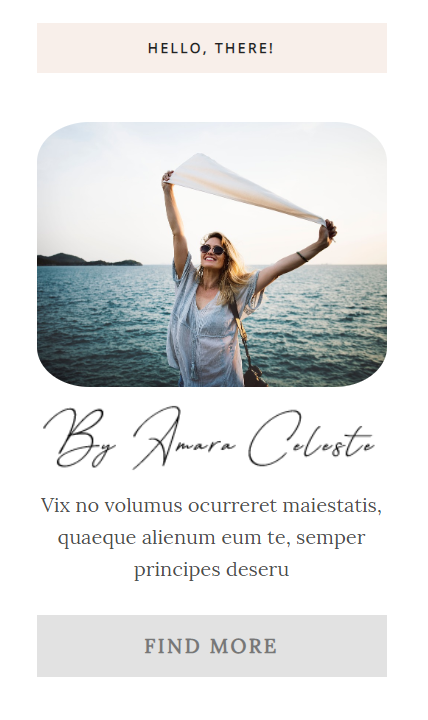
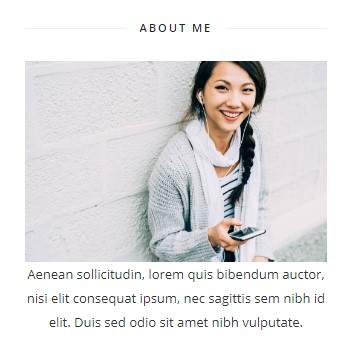
About Me
1. Go to Blogger Dashboard > Layout > About me widget > click on edit button
2. Now copy the below mention code and paste into widget.
3. Change the image url with author image url, description, # with social url
4. Save It
<div class="aboutme-content"> <br /> <img alt="Hello, There!" class="aboutme-image" src="https://1.bp.blogspot.com/-n9NNbVPtecE/Xd6p9LyN-OI/AAAAAAAABCI/v4466X5r1CYJ-64f0cz9_-gMWxVtmFXcwCLcBGAsYHQ/s1600/13.jpg" / /> <br /> <img alt="Hello, There!" class="signature-image" src="https://1.bp.blogspot.com/-s_wO6V3-NcE/Xd6r4qTFedI/AAAAAAAABCU/VipaM8MwaasVO7_GmX7CBRY6HxDHgFUQwCLcBGAsYHQ/s1600/sign.png" / /> <br /> <p class="centered">Vix no volumus ocurreret maiestatis, quaeque alienum eum te, semper principes deseru</p><br /> <p class="about-find-more"> <a href="https://newbeautytemplate.blogspot.com/">Find More</a></p><br /> <br /> </div>
6. Mobile Version ( Responsive Design Option )
Mobile Responsive
After you apply mobile version for this template, Color changing option will not work. This is official bug of Blogger. So, please make sure, you used Color changing option before do this step.
As default, Blogger will use its own template for you blog on mobile. So if you want to use Fashion template on mobile devices, please enable it first.
Access your Template menu and click on Gear button of Mobile template.
In Choose mobile template window, check “No. Show desktop template on mobile devices.” option, then click Save button.
7. Setup the Promo.
Now copy and paste the below mention code to widget content, replace the “/” with your link to your categories.
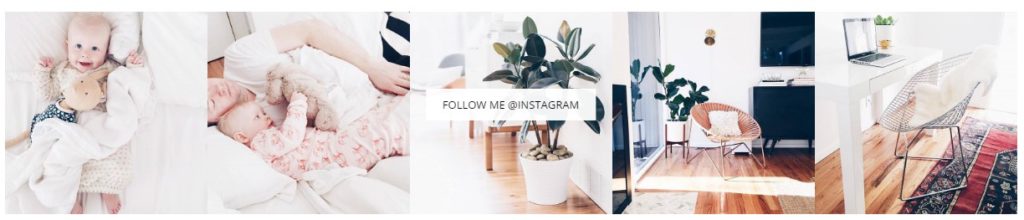
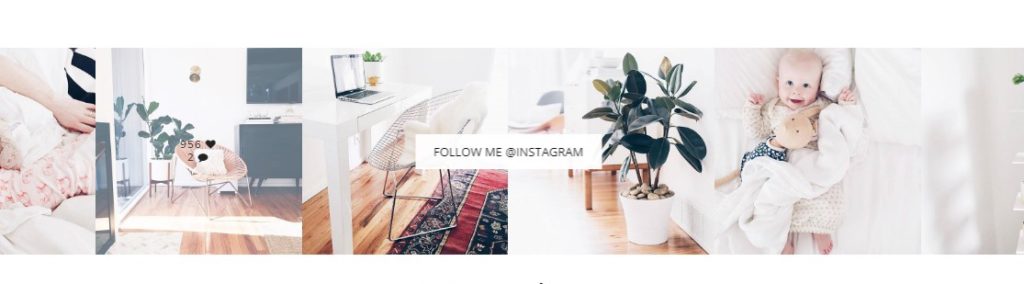
8. Instagram Widget
Access your blog Layout > click Edit link on Footer Instagram widget
1. Go to Blogger Dashboard > Layout > Instagram widget > click on edit button > Edit Html
2. Now copy the below mention code and paste into widget.
<div class=’insta-wrap’>
<div class=’my-insta-box’>
<a class=’btn-style’ href=’https://www.instagram.com/stella_edward_wedding/?hl=en’ rel=’me’>FOLLOW ME @INSTAGRAM</a>
</div>
</div>
<ul id=’instafeed’ class=’insta-slick’>
</ul>
<script type=’text/javascript’>//<![CDATA[
$(document).ready(function(){
var feed = new Instafeed({
get: ‘user’,
userId: 13371393773,
limit:14,
sortBy:’random’,
accessToken: ‘13371393773.1677ed0.3247ba96fbc54dac8e1b72c0bfb8b79d’,
after: function () {
var owl = $(‘.insta-slick’);
owl.slick({
dots: false,
infinite: false,
speed: 300,
prevArrow: ‘<button type=”button” class=”slick-nav slick-prev”><i class=”fa fa-angle-left”></i></button>’,
nextArrow: ‘<button type=”button” class=”slick-nav slick-next”><i class=”fa fa-angle-right”></i></button>’,
arrows:false,
slidesToShow: 7,
slidesToScroll: 2,
autoplay: true,
draggable:true,
infinite:true,
autoplaySpeed: 1000,
responsive: [
{
breakpoint: 1024,
settings: {
slidesToShow: 3,
slidesToScroll: 3,
infinite: true,
dots: false
}
},
{
breakpoint: 600,
settings: {
slidesToShow: 2,
slidesToScroll: 2
}
},
{
breakpoint: 480,
settings: {
slidesToShow: 1,
slidesToScroll: 1
}
}
// You can unslick at a given breakpoint now by adding:
// settings: “unslick”
// instead of a settings object
]
});
},
template: ‘<li><a href=”{{link}}” target=”_blank”><div class=”zoom-out-effect left”><div class=”img-box”><img src=”{{image}}” /></div></div></div></a></li>’,
resolution: ‘standard_resolution’
});
feed.run();
});
//]]>
</script>
Thank you.
The post Amara Fashion & Travel Blogger Template Documentation appeared first on Beautiful Feminine Blogger Templates for Women.
]]>The post Fashionista Fashion & Personal Blogger Template Documentation appeared first on Beautiful Feminine Blogger Templates for Women.
]]>First of all, Thank you for Downloading our template if you haven’t done yet you can get it from here: A Simple Blog Blogger Template. You check the live demo through the button below and also Please Read this documentation carefully in order to set up your blog and please note that there’s no support for free users.
1. Installation
Open your purchase folder, you will see a file with the name Fashionista-(Free or Premium)-Version.xml
Open this XML file with a text editor (Notepad or something like that). Then select all text and copy (Ctrl+A, Ctrl+C in Window).
Return to your blog dashboard, access your Template menu, click Edit HTML
In Editor HTML window, select all old code and paste the new code that you copied from the release file into code field. Then, click Save template.
Video Guide : –
2. Main Menu

- To Edit Top Menu in this theme you can follow this step:
1. Go to -> Blogger Dashboard- >layout -> Top navigation- > press edit button.

2. Now copy and paste the below mention code to widget content, replace the “#” with your link to your categories.
Save it.
To Edit Sidebar Social icons in this theme you can follow these steps:
-
- On Blogger Dashbord Click Layout
- Top Social Widget Click Edit button
Add your social media name and link >> ADD LINK >> Once you added all the links SAVE.
Use http:// or https:// where applicable.
AVAILABLE ICONS:
Behance Facebook Twitter Bloglovin Dribbble Flickr GooglePlus Instagram Linkedin Pinterest Vimeo Youtube Vine Soundcloud Goodreads Deviantart Foursquare Reddit Tumblr Spotify Twitch Vk Mailto shop Rss Etsy
Video Guide : –
4. Widget
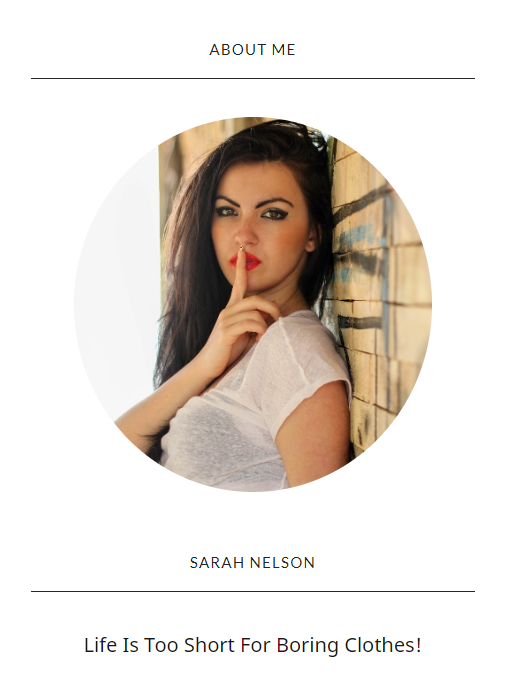
About Me
1. Go to Blogger Dashboard > Layout > About me widget > click on edit button
2. Now copy the below mention code and paste into widget.
3. Change the image url with author image url, description, # with social url
4. Save It
<center> <div class="photo-profile"><br /><br /><br /><img alt="a" class="image wp-image-139 attachment-medium size-medium" height="300" sizes="(max-width: 300px) 100vw, 300px" src="https://1.bp.blogspot.com/--GNb-nOd3Rs/XXjce9wJF0I/AAAAAAAAA_Q/78uMdtyVpKwJdidFPJxrQ6uwMKRZchOHQCLcBGAsYHQ/s1600/portrait-1097950_1280.jpg" / /><br /> </div> <br /> <br /><h2>Sarah Nelson</h2><p>Life Is Too Short For Boring Clothes!</p></center>
6. Mobile Version ( Responsive Design Option )
Mobile Responsive
After you apply mobile version for this template, Color changing option will not work. This is official bug of Blogger. So, please make sure, you used Color changing option before do this step.
As default, Blogger will use its own template for you blog on mobile. So if you want to use Fashion template on mobile devices, please enable it first.
Access your Template menu and click on Gear button of Mobile template.
In Choose mobile template window, check “No. Show desktop template on mobile devices.” option, then click Save button.
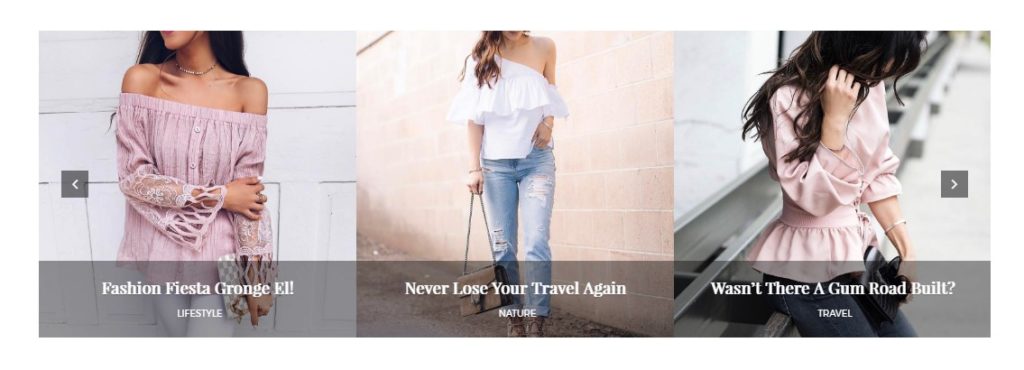
7. Setup the Slider
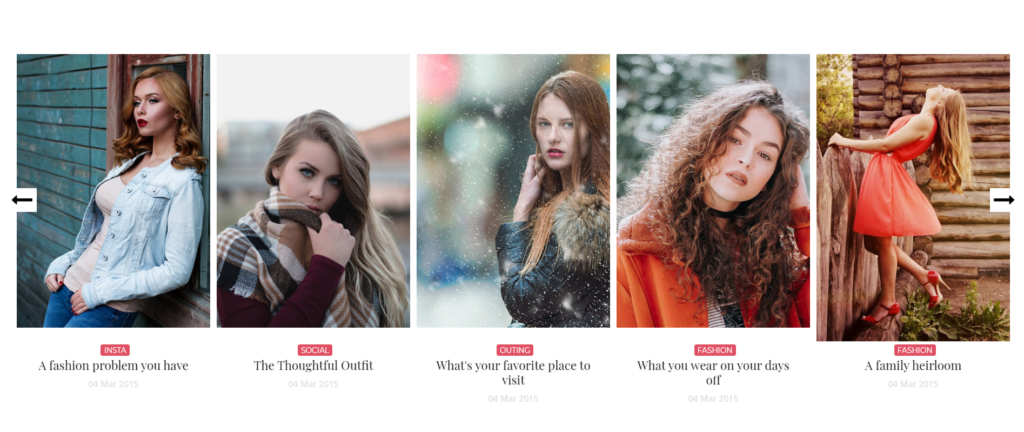
Slider Works automatically with the latest post.
But you need to make sure few things :
- Your Blog Must be public from settings
- Your Blog Feed Set to be full of settings -> other -> blog feed.
- Your blog post has at least One label in your latest (5) posts.
At least one label example: Sport is just an example.
8. Instagram Widget
Access your blog Layout > click Edit link on Footer Instagram widget
1. Go to Blogger Dashboard > Layout > Instagram widget > click on edit button > Edit Html
2. Now copy the below mention code and paste into widget.
<div class=’insta-wrap’>
<div class=’my-insta-box’>
<a class=’btn-style’ href=’https://www.instagram.com/stella_edward_wedding/?hl=en’ rel=’me’>FOLLOW ME @INSTAGRAM</a>
</div>
</div>
<ul id=’instafeed’ class=’insta-slick’>
</ul>
<script type=’text/javascript’>//<![CDATA[
$(document).ready(function(){
var feed = new Instafeed({
get: ‘user’,
userId: 13371393773,
limit:14,
sortBy:’random’,
accessToken: ‘13371393773.1677ed0.3247ba96fbc54dac8e1b72c0bfb8b79d’,
after: function () {
var owl = $(‘.insta-slick’);
owl.slick({
dots: false,
infinite: false,
speed: 300,
prevArrow: ‘<button type=”button” class=”slick-nav slick-prev”><i class=”fa fa-angle-left”></i></button>’,
nextArrow: ‘<button type=”button” class=”slick-nav slick-next”><i class=”fa fa-angle-right”></i></button>’,
arrows:false,
slidesToShow: 7,
slidesToScroll: 2,
autoplay: true,
draggable:true,
infinite:true,
autoplaySpeed: 1000,
responsive: [
{
breakpoint: 1024,
settings: {
slidesToShow: 3,
slidesToScroll: 3,
infinite: true,
dots: false
}
},
{
breakpoint: 600,
settings: {
slidesToShow: 2,
slidesToScroll: 2
}
},
{
breakpoint: 480,
settings: {
slidesToShow: 1,
slidesToScroll: 1
}
}
// You can unslick at a given breakpoint now by adding:
// settings: “unslick”
// instead of a settings object
]
});
},
template: ‘<li><a href=”{{link}}” target=”_blank”><div class=”zoom-out-effect left”><div class=”img-box”><img src=”{{image}}” /></div></div></div></a></li>’,
resolution: ‘standard_resolution’
});
feed.run();
});
//]]>
</script>
Thank you.
The post Fashionista Fashion & Personal Blogger Template Documentation appeared first on Beautiful Feminine Blogger Templates for Women.
]]>The post A Simple Blog Clean & Personal Blogger Template Documentation appeared first on Beautiful Feminine Blogger Templates for Women.
]]>First of all, Thank you for Downloading our template if you haven’t done yet you can get it from here: A Simple Blog Blogger Template. You check the live demo through the button below and also Please Read this documentation carefully in order to set up your blog and please note that there’s no support for free users.
1. Installation
Open your purchase folder, you will see a file with the name A Simple Blog-(Free or Premium)-Version.xml
Open this XML file with a text editor (Notepad or something like that). Then select all text and copy (Ctrl+A, Ctrl+C in Window).
Return to your blog dashboard, access your Template menu, click Edit HTML
In Editor HTML window, select all old code and paste the new code that you copied from the release file into code field. Then, click Save template.
Video Guide : –
2. Main Menu
- To Edit Top Menu in this theme you can follow this step:
1. Go to -> Blogger Dashboard- >layout -> Top navigation- > press edit button.
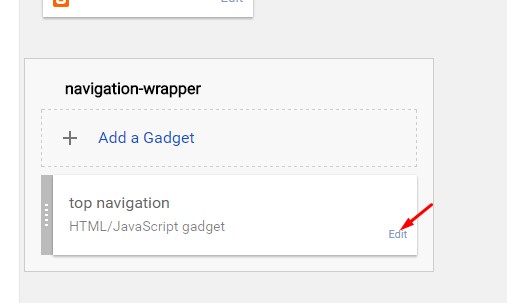
2. Now copy and paste the below mention code to widget content, replace the “#” with your link to your categories.
<li><a href='#'>Home</a></li>
<li><a href='#'>About</a></li>
<li><a href='#'>Contact</a>
<ul class='sub-menu'>
	<li><a href='#'>Category</a></li>
	<li><a href='#'>Category</a></li>
	<li><a href='#'>Category</a></li>
</ul>
</li>
<li><a href='#'>Shop</a></li>
<li><a href='#'>Advertise</a></li>
Image example :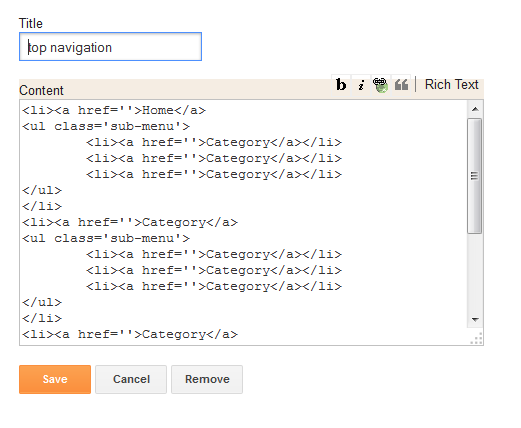 Save it.
To Edit Sidebar Social icons in this theme you can follow these steps:
-
- On Blogger Dashbord Click Layout
- Top Social Widget Click Edit button
Add your social media name and link >> ADD LINK >> Once you added all the links SAVE.
Use http:// or https:// where applicable.
AVAILABLE ICONS:
Behance Facebook Twitter Bloglovin Dribbble Flickr GooglePlus Instagram Linkedin Pinterest Vimeo Youtube Vine Soundcloud Goodreads Deviantart Foursquare Reddit Tumblr Spotify Twitch Vk Mailto shop Rss Etsy
Video Guide : –
4. Widget
About Me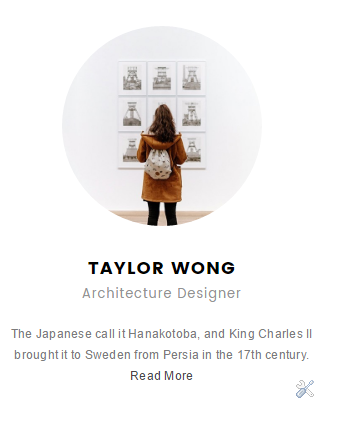
1. Go to Blogger Dashboard > Layout > About me widget > click on edit button
2. Now copy the below mention code and paste into widget.
3. Change the image url with author image url, description, # with social url
4. Save It
<img src="http://1.bp.blogspot.com/-zpDNZacsDcI/VfBSCr_qORI/AAAAAAAAG6U/gHTIJ6z5_Sg/s1600/profile.jpg"/><h3>Jessica Jackson</h3><p>
A short description about yourself goes here. Lorem ipsum dolor sit amet. Adipisicing elit, sed do eiusmod tempor.</p>
6. Mobile Version ( Responsive Design Option )
Mobile Responsive
After you apply mobile version for this template, Color changing option will not work. This is official bug of Blogger. So, please make sure, you used Color changing option before do this step.
As default, Blogger will use its own template for you blog on mobile. So if you want to use Fashion template on mobile devices, please enable it first.
Access your Template menu and click on Gear button of Mobile template.
In Choose mobile template window, check “No. Show desktop template on mobile devices.” option, then click Save button.
7. Trending
To start the what’s new carousel you just need to Blogger Dashboard > Layout >top-banner and put a label in the widget.
Thank you.
The post A Simple Blog Clean & Personal Blogger Template Documentation appeared first on Beautiful Feminine Blogger Templates for Women.
]]>The post Stella Clean & Personal Blogger Template Documentation appeared first on Beautiful Feminine Blogger Templates for Women.
]]>First of all, Thank you for Downloading our template if you haven’t done yet you can get it from here : Stella Blogger Template. You check the live demo through the button below and also Please Read this documentation carefully in order to set up your blog and please note that there’s no support for free users.
1. Installation
Open your purchase folder, you will see a file with name Stella-(Free or Premium)-Version.xml
Open this XML file with a text editor (Notepad or something like that). Then select all text and copy (Ctrl+A, Ctrl+C in Window).
Return to your blog dashboard, access your Template menu, click Edit HTML
In Editor HTML window, select all old code and paste the new code that you copied from the release file into code field. Then, click Save template.
Video Guide : –
2. Main Menu/DropDown
![]()
- On Blogger Dashboard Click Layout.
- Click Edit on Main Menu Widget.
- Change it according to your needs. Add name of the link Name and link url then click add Link
- Click Save.
- To Add sub menu Item. You have to add “_”(underscore without quotes) before Menu item Link (example : _Left Sidebar)
- Change the location of menu item using arrow down and arrow up Icon
- For More Information- Watch Video Below

2.1 Mega Menu
Now what if you want a mega menu? that is easy to do. Click Edit on Main Menu Widget and then follow the image.
Look at the picture below.
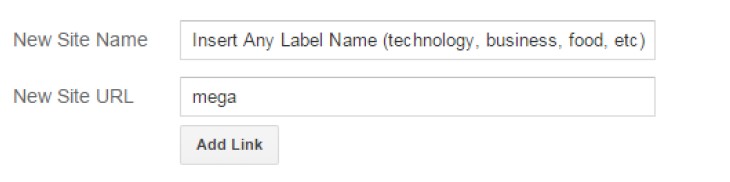
All you have to do is to insert a label name in the first field and the word “mega” in the second field.
3. Setting Up The Top Social Menu

To Edit Top Social icons in this theme you can follow these steps:
-
- On Blogger Dashbord Click Layout
- Top Social Widget Click Edit button
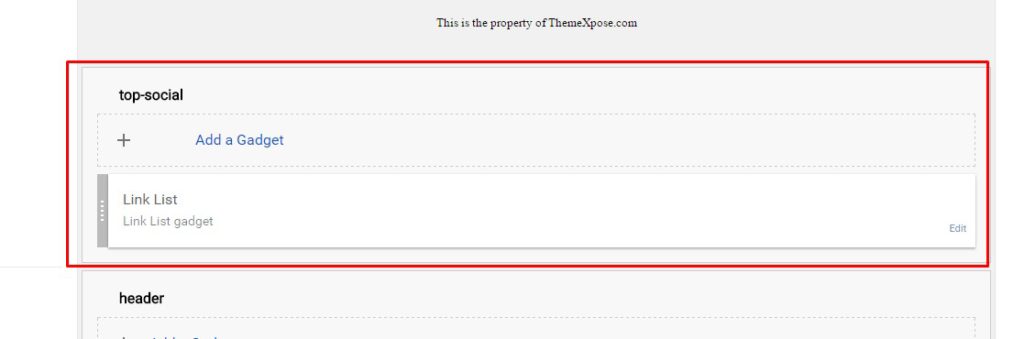
Add your social media name and link >> ADD LINK >> Once you added all the links SAVE.
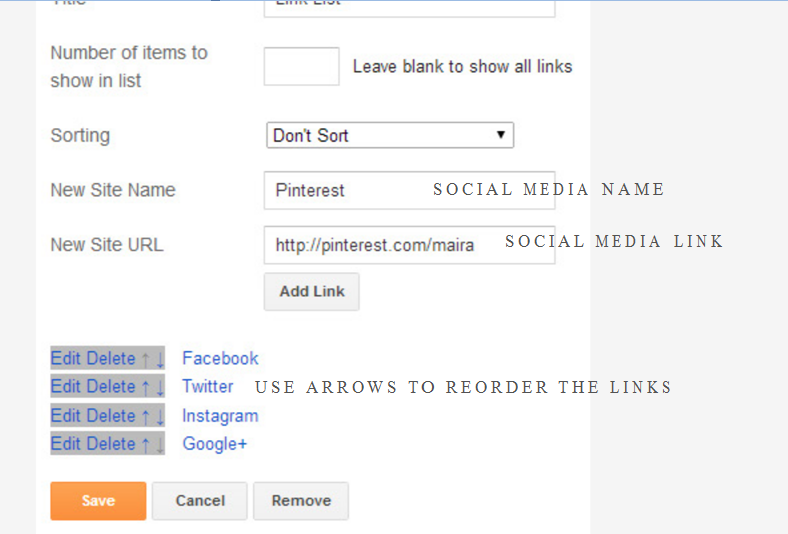
Use http:// or https:// where applicable.
To Edit Sidebar Social icons in this theme you can follow these steps:
-
- On Blogger Dashbord Click Layout
- Top Social Widget Click Edit button
Add your social media name and link >> ADD LINK >> Once you added all the links SAVE.
Use http:// or https:// where applicable.
AVAILABLE ICONS:
Behance Facebook Twitter Bloglovin Dribbble Flickr GooglePlus Instagram Linkedin Pinterest Vimeo Youtube Vine Soundcloud Goodreads Deviantart Foursquare Reddit Tumblr Spotify Twitch Vk Mailto shop Rss Etsy
Video Guide : –
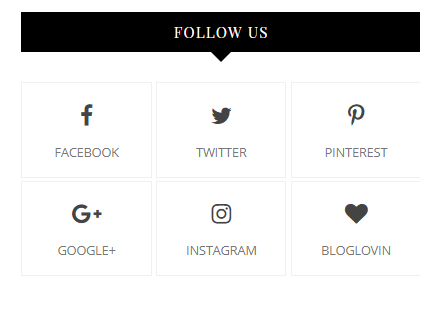
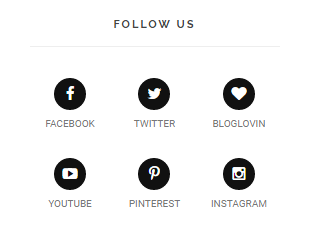
3 To Edit Footer Social icons in this theme you can follow these steps:

1. Go to -> Blogger Dashboard- >layout -> top social- > press edit button.
2. Now copy and paste of below mention code, replace the “#” with your link to your social network accounts.
<a href='' target='_blank'>
<i class='fa fa-facebook'> </i>
<span>Facebook</span>
</a>
<a href='' target='_blank'>
<i class='fa fa-twitter'></i>
 <span>Twitter</span>
 </a>
 <a href='' target='_blank'>
 <i class='fa fa-instagram'></i>
 <span>Instagram</span>
 </a>
 <a href='' target='_blank'>
 <i class='fa fa-pinterest'></i>
 <span>Pinterest</span>
 </a>
 <a href='' target='_blank'>
 <i class='fa fa-heart'></i>
 <span>Bloglovin</span>
 </a>
4. Widget
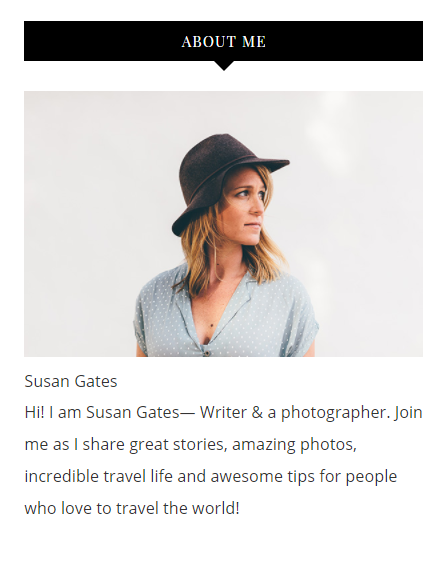
About Me
1. Go to Blogger Dashboard > Layout > About me widget > click on edit button
2. Now copy the below mention code and paste into widget.
3. Change the image url with author image url, description, # with social url
4. Save It
<img src="http://1.bp.blogspot.com/-zpDNZacsDcI/VfBSCr_qORI/AAAAAAAAG6U/gHTIJ6z5_Sg/s1600/profile.jpg"/><h3>Jessica Jackson</h3><p>
A short description about yourself goes here. Lorem ipsum dolor sit amet. Adipisicing elit, sed do eiusmod tempor.</p>
Sidebar Social widget
To Edit Sidebar Social icons in this theme you can follow these steps:
-
- On Blogger Dashbord Click Layout
- Sidebar Social Widget Click Edit button
Add your social media name and link >> ADD LINK >> Once you added all the links SAVE.

Use http:// or https:// where applicable.
AVAILABLE ICONS: Behance Facebook Twitter Bloglovin Dribbble Flickr GooglePlus Instagram Linkedin Pinterest Vimeo Youtube Vine Soundcloud Goodreads Deviantart Foursquare Reddit Tumblr Spotify Twitch Vk Mailto shop Rss Etsy
5. Instagram Widget
1. Go to Blogger Dashboard > Layout > Instagram widget > click on edit button > Edit Html
2. Now copy the below mention code and paste into widget.
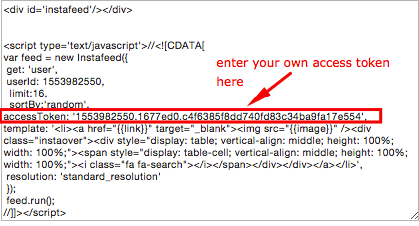
3. Now you need to create your access token
<div class='insta-wrap'>
<div class='my-insta-box'>
<a class='btn-style' href='//instagram.com/xposetheme' rel='me'>FOLLOW ME @INSTAGRAM</a>
</div>
</div>
<div id='instafeed'/>


<script type='text/javascript'>//<![CDATA[

var feed = new Instafeed({
 get: 'user',
 userId: 10008029,
  limit:16,
  sortBy:'random',
accessToken: '1531863919.1677ed0.23d238bc564249e799095d060c750218',
template: '<li><a href="{{link}}" target="_blank"><img src="{{image}}" /><div class="insta-likes"><div style="display: table; vertical-align: middle; height: 100%; width: 100%;"><span style="display: table-cell; vertical-align: middle; height: 100%; width: 100%;">{{likes}} <i class="fa fa-heart"></i><br/>{{comments}} <i class="fa fa-comment"></i></span></div></div></a></li>',
 resolution: 'standard_resolution'
 });
 feed.run();


//]]>
</script></div>
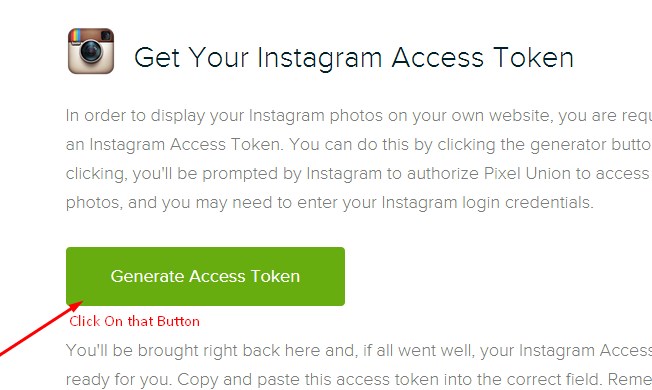
you need access token for instagram widget to work Go to this url-> Click here to Generate access token

| Note | |
| Generate Access Token | you need access token for instagram widget to work Go to this url-> http://instagram.pixelunion.net/
Generate access token |
| Sign In and Follow the steps | Then You’ll be given an access token like this 1531863919.1677ed0.23d238bc564249e799095d060c750218 |
| Follow The next step | Add Instagram User ID: |
6. Mobile Version ( Responsive Design Option )
Mobile Responsive
After you apply mobile version for this template, Color changing option will not work. This is official bug of Blogger. So, please make sure, you used Color changing option before do this step.
As default, Blogger will use its own template for you blog on mobile. So if you want to use Fashion template on mobile devices, please enable it first.
Access your Template menu and click on Gear button of Mobile template.
In Choose mobile template window, check “No. Show desktop template on mobile devices.” option, then click Save button.
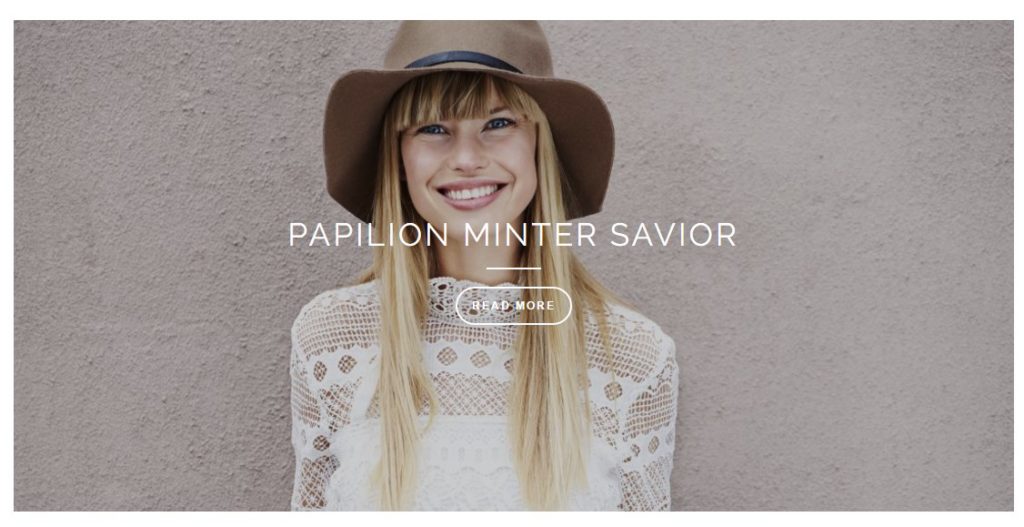
7. Trending
To start the what’s new carousel you just need to Blogger Dashboard > Layout >top-banner and put a label in the widget.
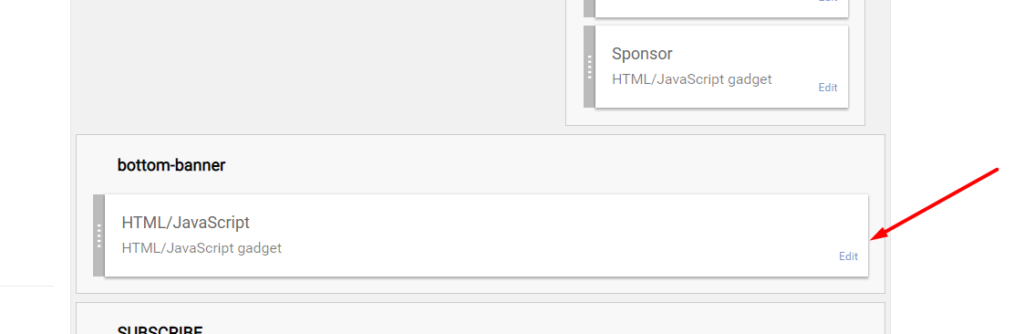
8. bottom-banner
To start the what’s bottom-banner you just need to Blogger Dashboard > Layout >top-banner and put a label in the widget.
The post Stella Clean & Personal Blogger Template Documentation appeared first on Beautiful Feminine Blogger Templates for Women.
]]>The post Melissa – Personal Blogger Template Documentation appeared first on Beautiful Feminine Blogger Templates for Women.
]]>First of all, Thank you for Downloading our template if you haven’t done yet you can get it from here : Emma Blogger Template. You check the live demo through the button below and also Please Read this documentation carefully in order to set up your blog and please note that there’s no support for free users.
1. Installation
Open your purchase folder, you will see a file with name Malissa-(Free or Premium)-Version.xml
Open this XML file with a text editor (Notepad or something like that). Then select all text and copy (Ctrl+A, Ctrl+C in Window).
Return to your blog dashboard, access your Template menu, click Edit HTML
In Editor HTML window, select all old code and paste the new code that you copied from the release file into code field. Then, click Save template.
Video Guide : –
2. Setting Up The Menu

To Edit Top Menu in this theme you can follow this step:
1. Go to -> Blogger Dashboard- >layout -> Top navigation- > press edit button.
2. Now copy and paste the below mention code to widget content, replace the “#” with your link to your categories.
<li><a href='#'>Home</a></li>
<li><a href='#'>About</a></li>
<li><a href='#'>Contact</a>
<ul class='sub-menu'>
	<li><a href='#'>Category</a></li>
	<li><a href='#'>Category</a></li>
	<li><a href='#'>Category</a></li>
</ul>
</li>
<li><a href='#'>Shop</a></li>
<li><a href='#'>Advertise</a></li>
3. Setting Up The Top Social Menu
To Edit Top Social icons in this theme you can follow these steps:
-
- On Blogger Dashbord Click Layout
- Top Social Widget Click Edit button
Add your social media name and link >> ADD LINK >> Once you added all the links SAVE.
Use http:// or https:// where applicable.
To Edit Sidebar Social icons in this theme you can follow these steps:
-
- On Blogger Dashbord Click Layout
- Top Social Widget Click Edit button
Add your social media name and link >> ADD LINK >> Once you added all the links SAVE.
Use http:// or https:// where applicable.
AVAILABLE ICONS:
Behance Facebook Twitter Bloglovin Dribbble Flickr GooglePlus Instagram Linkedin Pinterest Vimeo Youtube Vine Soundcloud Goodreads Deviantart Foursquare Reddit Tumblr Spotify Twitch Vk Mailto shop Rss Etsy
Video Guide : –
3 To Edit Footer Social icons in this theme you can follow these steps:
1. Go to -> Blogger Dashboard- >layout -> top social- > press edit button.
2. Now copy and paste of below mention code, replace the “#” with your link to your social network accounts.
<a href='' target='_blank'>
<i class='fa fa-facebook'> </i>
<span>Facebook</span>
</a>
<a href='' target='_blank'>
<i class='fa fa-twitter'></i>
 <span>Twitter</span>
 </a>
 <a href='' target='_blank'>
 <i class='fa fa-instagram'></i>
 <span>Instagram</span>
 </a>
 <a href='' target='_blank'>
 <i class='fa fa-pinterest'></i>
 <span>Pinterest</span>
 </a>
 <a href='' target='_blank'>
 <i class='fa fa-heart'></i>
 <span>Bloglovin</span>
 </a>
4. Setup the Slider
Slider Works automatically with latest post.
But you need to make sure few things :
- Your Blog Must be public from settings
- Your Blog Feed Set to be full from settings -> other -> blog feed.
- Your blog post has at least One label in you latest (5) posts.
Atleast one label example : Sport is just an example.

5. About The Author Widget
To Author Widget in this theme you can follow these steps:
- On Blogger Dashbord Click layout
- Click Edit On Author Widget
- Add The following code
<div class="about-me">
        <img src="http://3.bp.blogspot.com/-ojzRtpJZw6E/VQk3l9nnFrI/AAAAAAAABnU/skDzx4vL5xc/s1600/photo-1416339684178-3a239570f315.jpg" alt="About Amalie" />

        <p>Lorem ipsum dolor sit amet, consectetur adipiscing elit. Praesent non leo vestibulum, condimentum elit non, venenatis eros.</p></div>
- Change Image Url with yours URL link and text with your text.
5. Add Pinterest Widget
If right pane doesn’t have a searchbar then you can add it by yourself:
Step 1: Goto Layout section, click on the edit button of Pinterest widget.
Step 2: Select HTML/Javascript widget.
Step 3: Paste the below code.
<p style='text-align:center'><a href='https://www.pinterest.com/#' target='_blank'>Follow @Beauty Templates</a><div id='pinterest-gallery'></div><script>var thumbnailCount = 6;var username = 'greyandscout';</script></p><div class="clear"/></div>
Change the Account URL and Username with your details
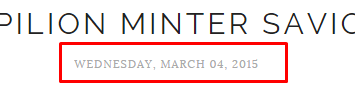
6. How To Set Date On Post
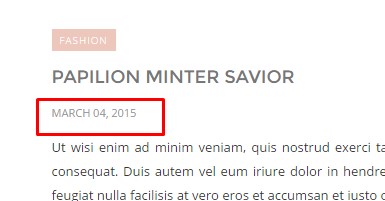
Go to Blogger Dashboard > Settings > Language and Formatting > Formatting > Timestamp Format > set it to date instead of time
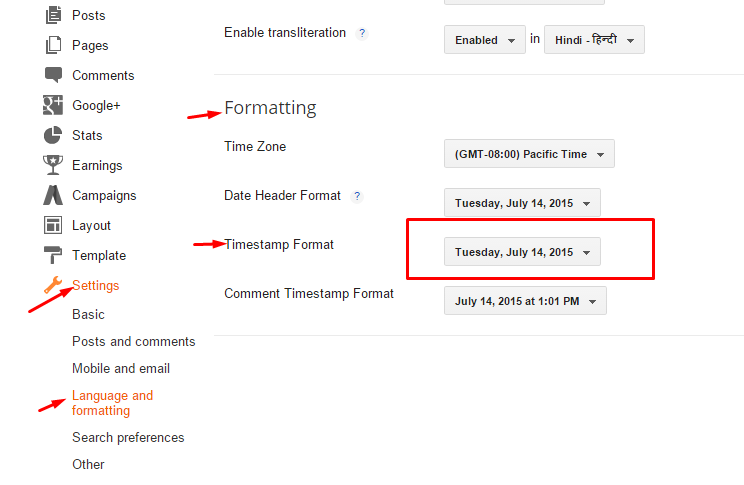
Save it
7. Instagram Widget
1. Go to Blogger Dashboard > Layout > Instagram widget > click on edit button > Edit Html
2. Now copy the below mention code and paste into widget.
3. Now you need to create your access token
<div class='insta-wrap'>
<div class='my-insta-box'>
<a class='btn-style' href='//instagram.com/xposetheme' rel='me'>FOLLOW ME @INSTAGRAM</a>
</div>
</div>
<div id='instafeed'/>


<script type='text/javascript'>//<![CDATA[

var feed = new Instafeed({
 get: 'user',
 userId: 10008029,
  limit:16,
  sortBy:'random',
accessToken: '1531863919.1677ed0.23d238bc564249e799095d060c750218',
template: '<li><a href="{{link}}" target="_blank"><img src="{{image}}" /><div class="insta-likes"><div style="display: table; vertical-align: middle; height: 100%; width: 100%;"><span style="display: table-cell; vertical-align: middle; height: 100%; width: 100%;">{{likes}} <i class="fa fa-heart"></i><br/>{{comments}} <i class="fa fa-comment"></i></span></div></div></a></li>',
 resolution: 'standard_resolution'
 });
 feed.run();


//]]>
</script></div>
you need access token for instagram widget to work Go to this url-> Click here to Generate access token
| Note | |
| Generate Access Token | you need access token for instagram widget to work Go to this url-> http://instagram.pixelunion.net/
Generate access token |
| Sign In and Follow the steps | Then You’ll be given an access token like this 1531863919.1677ed0.23d238bc564249e799095d060c750218 |
| Follow The next step | Add Instagram User ID: |
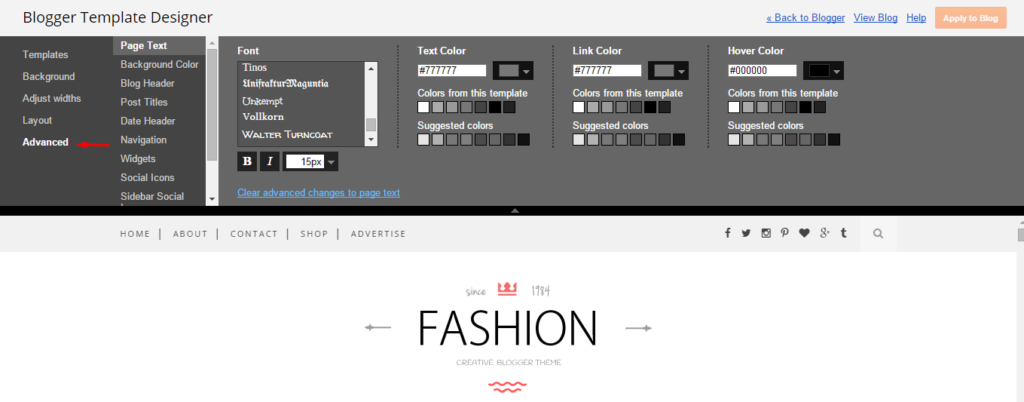
8. Customizer – Change The Color And Font Of The Template (Only Avialabel In Premium Version)
Go to Blogger Dashboard > Template > Customize
Now Click on Advance > Main color -> change color according to your need and then press apply button.
9. Mobile Version ( Responsive Design Option )
Mobile Responsive
After you apply mobile version for this template, Color changing option will not work. This is official bug of Blogger. So, please make sure, you used Color changing option before do this step.
As default, Blogger will use its own template for you blog on mobile. So if you want to use Fashion template on mobile devices, please enable it first.
Access your Template menu and click on Gear button of Mobile template.

In Choose mobile template window, check “No. Show desktop template on mobile devices.” option, then click Save button.
The post Melissa – Personal Blogger Template Documentation appeared first on Beautiful Feminine Blogger Templates for Women.
]]>The post Travelista Travel Blogger Template Documentation appeared first on Beautiful Feminine Blogger Templates for Women.
]]>First of all, Thank you for Downloading our template if you haven’t done yet you can get it from here: Travelista BlogTemplate.te . You check the live demo through the button below and also Please Read this documentation carefully in order to set up your blog and please note that there’s no support for free users.
1. Installation
Open your purchase folder, you will see a file with name Travelista-(Free or Premium)-Version.xml
Open this XML file with a text editor (Notepad or something like that). Then select all text and copy (Ctrl+A, Ctrl+C in Window).
Return to your blog dashboard, access your Template menu, click Edit HTML
In Editor HTML window, select all old code and paste the new code that you copied from the release file into code field. Then, click Save template.
Video Guide : –
2. Setting Up The Menu

To Edit Top Menu in this theme you can follow this step:
1. Go to -> Blogger Dashboard- >layout -> Top navigation- > press edit button.
2. Now copy and paste the below mention code to widget content, replace the “#” with your link to your categories.
<li><a href='#'>Home</a></li>
<li><a href='#'>About</a></li>
<li><a href='#'>Contact</a>
<ul class='sub-menu'>
	<li><a href='#'>Category</a></li>
	<li><a href='#'>Category</a></li>
	<li><a href='#'>Category</a></li>
</ul>
</li>
<li><a href='#'>Shop</a></li>
<li><a href='#'>Advertise</a></li>
3. Setting Up The Top Social Menu
To Edit Top Social icons in this theme you can follow these steps:
-
- On Blogger Dashbord Click Layout
- Top Social Widget Click Edit button
Add your social media name and link >> ADD LINK >> Once you added all the links SAVE.
Use http:// or https:// where applicable.
To Edit Sidebar Social icons in this theme you can follow these steps:
-
- On Blogger Dashbord Click Layout
- Top Social Widget Click Edit button
Add your social media name and link >> ADD LINK >> Once you added all the links SAVE.
Use http:// or https:// where applicable.
AVAILABLE ICONS:
Behance Facebook Twitter Bloglovin Dribbble Flickr GooglePlus Instagram Linkedin Pinterest Vimeo Youtube Vine Soundcloud Goodreads Deviantart Foursquare Reddit Tumblr Spotify Twitch Vk Mailto shop Rss Etsy
Video Guide : –
4. About The Author Widget
To Author Widget in this theme you can follow these steps:
- On Blogger Dashbord Click layout
- Click Edit On Author Widget
- Add The following code
<div class="about-me">
        <img src="http://3.bp.blogspot.com/-ojzRtpJZw6E/VQk3l9nnFrI/AAAAAAAABnU/skDzx4vL5xc/s1600/photo-1416339684178-3a239570f315.jpg" alt="About Amalie" />

        <p>Lorem ipsum dolor sit amet, consectetur adipiscing elit. Praesent non leo vestibulum, condimentum elit non, venenatis eros.</p></div>
- Change Image Url with yours URL link and text with your text.
5. Setup the Slider
Slider Works automatically with the latest post.
But you need to make sure few things:
- Your Blog Must be public from settings
- Your Blog Feed Set to be full from settings -> other -> blog feed.
- Your blog post has at least One label in you latest (5) posts.
Atleast one label example : Sport is just an example.
6. How To Set Date On Post
Go to Blogger Dashboard > Settings > Language and Formatting > Formatting > Timestamp Format > set it to date instead of time
Save it
7. Instagram Widget
1. Go to Blogger Dashboard > Layout > Instagram widget > click on edit button > Edit Html
2. Now copy the below mention code and paste into widget.
3. Now you need to create your access token
<div class='insta-wrap'>
<div class='my-insta-box'>
<a class='btn-style' href='//instagram.com/xposetheme' rel='me'>FOLLOW ME @INSTAGRAM</a>
</div>
</div>
<div id='instafeed'/>


<script type='text/javascript'>//<![CDATA[

var feed = new Instafeed({
 get: 'user',
 userId: 10008029,
  limit:16,
  sortBy:'random',
accessToken: '1531863919.1677ed0.23d238bc564249e799095d060c750218',
template: '<li><a href="{{link}}" target="_blank"><img src="{{image}}" /><div class="insta-likes"><div style="display: table; vertical-align: middle; height: 100%; width: 100%;"><span style="display: table-cell; vertical-align: middle; height: 100%; width: 100%;">{{likes}} <i class="fa fa-heart"></i><br/>{{comments}} <i class="fa fa-comment"></i></span></div></div></a></li>',
 resolution: 'standard_resolution'
 });
 feed.run();


//]]>
</script></div>
you need access token for instagram widget to work Go to this url-> Click here to Generate access token
| Note | |
| Generate Access Token | you need access token for instagram widget to work Go to this url-> http://instagram.pixelunion.net/
Generate access token |
| Sign In and Follow the steps | Then You’ll be given an access token like this 1531863919.1677ed0.23d238bc564249e799095d060c750218 |
| Follow The next step | Add Instagram User ID: |
8. Customizer – Change The Color And Font Of The Template (Only Avialabel In Premium Version)
Go to Blogger Dashboard > Template > Customize
Now Click on Advance > Main color -> change color according to your need and then press apply button.
9. Mobile Version ( Responsive Design Option )
Mobile Responsive
After you apply mobile version for this template, Color changing option will not work. This is official bug of Blogger. So, please make sure, you used Color changing option before do this step.
As default, Blogger will use its own template for you blog on mobile. So if you want to use Fashion template on mobile devices, please enable it first.
Access your Template menu and click on Gear button of Mobile template.
In Choose mobile template window, check “No. Show desktop template on mobile devices.” option, then click Save button.
The post Travelista Travel Blogger Template Documentation appeared first on Beautiful Feminine Blogger Templates for Women.
]]>The post Orchid – A Clean Blogger Template Documentation appeared first on Beautiful Feminine Blogger Templates for Women.
]]>First of all, Thank you for Downloading our template if you haven’t done yet you can get it from here : Orchid Blogger Template . You check the live demo through the button below and also Please Read this documentation carefully in order to set up your blog and please note that there’s no support for free users.
1. Installation
Open your purchase folder, you will see a file with name Orchid-(Free or Premium)-Version.xml
Open this XML file with a text editor (Notepad or something like that). Then select all text and copy (Ctrl+A, Ctrl+C in Window).
Return to your blog dashboard, access your Template menu, click Edit HTML
In Editor HTML window, select all old code and paste the new code that you copied from the release file into code field. Then, click Save template.
Video Guide : –
2. Navigation Menu
2.1 Top Menu Setup

- On Blogger Dashboard Click Layout.
- Click Edit on Top Navigation Widget.
- Change it according to your needs. Add name of the link Name and link url then click add Link
- Click Save.
- Change the location of menu item using arrow down and arrow up Icon
- For More Information- Watch Video Below

2.2 Main Menu/DropDown

- On Blogger Dashboard Click Layout.
- Click Edit on Main Menu Widget.
- Change it according to your needs. Add name of the link Name and link url then click add Link
- Click Save.
- To Add sub menu Item. You have to add “_”(underscore without quotes) before Menu item Link (example : _Left Sidebar)
- Change the location of menu item using arrow down and arrow up Icon
- For More Information- Watch Video Below
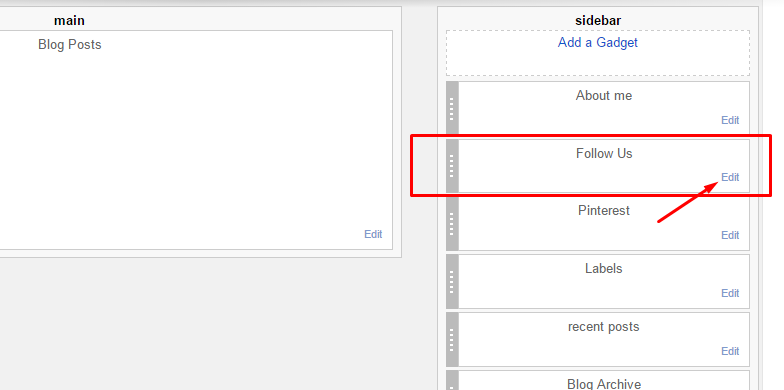
3. Social Top / Follow Us (Sidebar)

Example:
For Example if you have to add “facebook” icon then just add facebook in name of New site name section and below add url of that particular site.

Video Guide : –
4. Setup the Slider
Slider Works automatically with latest post.
But you need to make sure few things :
- Your Blog Must be public from settings
- Your Blog Feed Set to be full from settings -> other -> blog feed.
- Your blog post has at least One label in you latest (5) posts.
Atleast one label example : Sport is just an example.
5. About The Author Widget
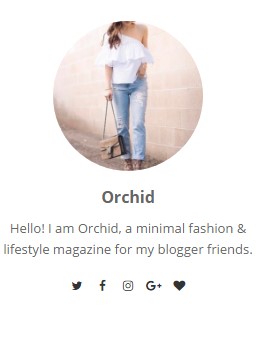
To Author Widget in this theme you can follow these steps:
- On Blogger Dashbord Click layout
- Click Edit On Author Widget
- Add The following code
<div class="about-me-widget"> <div class="author-img"> <img class="author_image" src="https://3.bp.blogspot.com/-ot-X_o3jfy4/WTcX48LtuYI/AAAAAAAAAhg/CKJFI2EvIzcweIyZ-e-bS8vDAqCMX5olwCLcB/s1600/05-340x360.jpg" alt="Applique" /> </div> <div class="author-description"> <h3 class="name">Applique</h3> <p class="author-intro">Hello! I am applique, a minimal fashion & lifestyle magazine for my blogger friends.</p> </div> <div class="social-icons"> <a href="#" title="Twitter!" target="_blank"><i class="fa fa-twitter"></i></a> <a href="#" title="Facebook" target="_blank"><i class="fa fa-facebook"></i></a> <a href="#" title="Instagram" target="_blank"><i class="fa fa-instagram"></i></a> <a href="#" title="Google+" target="_blank"><i class="fa fa-google-plus"></i></a> <a href="#" title="Bloglovin" target="_blank"><i class="fa fa-heart"></i></a> </div> </div>
- Change Image Url with yours URL link and text with your text.
5. Widget

Access your blog Layout > click Add a Gadget > HTML/JavaScript on Sidebar or Footer section, you must place the following names highlighted in blue below.
Now add this code : 3/recentposts
you can increase / decrease this value 3 – its defines how many posts.
Image Example:

6. Instagram Widget
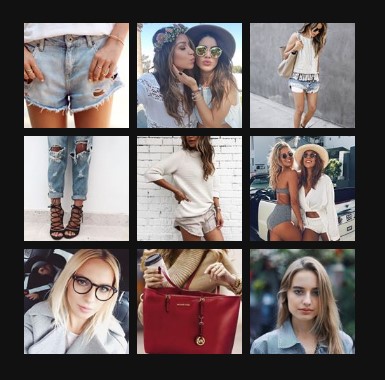
1. Go to Blogger Dashboard > Layout > Instagram widget > click on edit button > Edit Html
2. Now copy the below mention code and paste into widget.
3. Now you need to create your access token
<div id='instafeed'/>


<script type='text/javascript'>//<![CDATA[

var feed = new Instafeed({
 get: 'user',
 userId: 10008029,
  limit:9,
  sortBy:'random',
accessToken: '1531863919.1677ed0.23d238bc564249e799095d060c750218',
template: '<li><a href="{{link}}" target="_blank"><img src="{{image}}" /><div class="insta-likes"><div style="display: table; vertical-align: middle; height: 100%; width: 100%;"><span style="display: table-cell; vertical-align: middle; height: 100%; width: 100%;">{{likes}} <i class="fa fa-heart"></i><br/>{{comments}} <i class="fa fa-comment"></i></span></div></div></a></li>',
 resolution: 'standard_resolution'
 });
 feed.run();


//]]>
</script></div>
you need access token for instagram widget to work Go to this url-> Click here to Generate access token
| Note | |
| Generate Access Token | you need access token for instagram widget to work Go to this url-> http://instagram.pixelunion.net/
Generate access token |
| Sign In and Follow the steps | Then You’ll be given an access token like this 1531863919.1677ed0.23d238bc564249e799095d060c750218 |
| Follow The next step | Add Instagram User ID: |
7.Comments System
[blogger][facebook]
[facebook][blogger]
[disqus][facebook][blogger]
[blogger][disqus][facebook]
[disqus][blogger][facebook]
Disqus Shortname
- What you have to do is just add the shortname

8. Page Layout / No Sidebar / Left Sidebar
To add these options just add the codes below in the composition of the post!
Image Example:

9. Customizer – Change The Color And Font Of The Template (Only Availabel In Premium Version)
Go to Blogger Dashboard > Template > Customize
Now Click on Advance > Main color -> change color according to your need and then press apply button.
9. Mobile Version ( Responsive Design Option )
Mobile Responsive
After you apply mobile version for this template, Color changing option will not work. This is official bug of Blogger. So, please make sure, you used Color changing option before do this step.
As default, Blogger will use its own template for you blog on mobile. So if you want to use Fashion template on mobile devices, please enable it first.
Access your Template menu and click on Gear button of Mobile template.
In Choose mobile template window, check “No. Show desktop template on mobile devices.” option, then click Save button.
The post Orchid – A Clean Blogger Template Documentation appeared first on Beautiful Feminine Blogger Templates for Women.
]]>The post Trendy Minimal Blogger Template Documentation appeared first on Beautiful Feminine Blogger Templates for Women.
]]>First of all, Thank you for Downloading our template if you haven’t done yet you can get it from here : Trendy Blogger Template . You check the live demo through the button below and also Please Read this documentation carefully in order to set up your blog and please note that there’s no support for free users.
1. Installation
Open your purchase folder, you will see a file with name Trendy-(Free or Premium)-Version.xml
Open this XML file with a text editor (Notepad or something like that). Then select all text and copy (Ctrl+A, Ctrl+C in Window).
Return to your blog dashboard, access your Template menu, click Edit HTML
In Editor HTML window, select all old code and paste the new code that you copied from the release file into code field. Then, click Save template.
Video Guide : –
2. Navigation Menu
2.1 Top Menu Setup
![]()
To Edit Top Menu in this theme you can follow this step:
1. Go to -> Blogger Dashboard- >layout -> Pages – > press edit button.
Main Navigation :
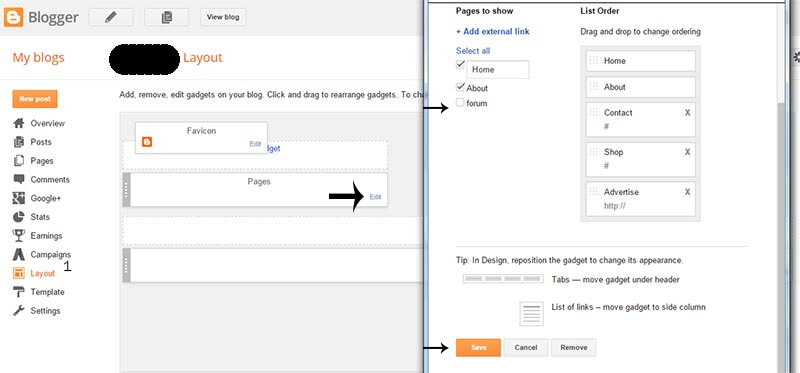
2. Now choose ( check mark ) those pages you want to show on menu and press save. You can also add the external link just press ADD external Link and add you link then save it..
2.2 Main Menu/DropDown
- On Blogger Dashboard Click Layout.
- Click Edit on Main Menu Widget.
- Change it according to your needs. Add name of the link Name and link url then click add Link
- Click Save.
- To Add sub menu Item. You have to add “_”(underscore without quotes) before Menu item Link (example : _Left Sidebar)
- Change the location of menu item using arrow down and arrow up Icon
- For More Information- Watch Video Below
3. Setting Up The Top Social Menu

To Edit Top Social icons in this theme you can follow these steps:
-
- On Blogger Dashbord Click Layout
- Top Social Widget Click Edit button
Add your social media name and link >> ADD LINK >> Once you added all the links SAVE.
Use http:// or https:// where applicable.
To Edit Sidebar Social icons in this theme you can follow these steps:
-
- On Blogger Dashbord Click Layout
- Top Social Widget Click Edit button
Add your social media name and link >> ADD LINK >> Once you added all the links SAVE.
Use http:// or https:// where applicable.
AVAILABLE ICONS:
Behance Facebook Twitter Bloglovin Dribbble Flickr GooglePlus Instagram Linkedin Pinterest Vimeo Youtube Vine Soundcloud Goodreads Deviantart Foursquare Reddit Tumblr Spotify Twitch Vk Mailto shop Rss Etsy
Video Guide : –
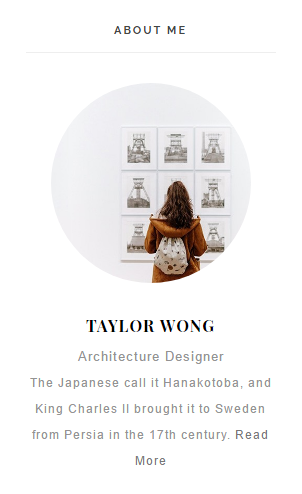
4. About The Author Widget
To Author Widget in this theme you can follow these steps:
- On Blogger Dashbord Click layout
- Click Edit On Author Widget
- Add The following code
<center> <div class="photo-profile"> <img alt="Photo Profile" src="https://4.bp.blogspot.com/-hbcC65fMS1c/V4pt3qj06nI/AAAAAAAAIaA/FQ2L-6JXGusu_Nv4gdizZafCf93JU0vnwCLcB/s1600/about-image.jpg" / /> </div> <div class="bio-profile"> <span class="profile-name">Taylor Wong</span> <span class="profile-job">Architecture Designer<span class="sparator center"></span> <p>The Japanese call it Hanakotoba, and King Charles II brought it to Sweden from Persia in the 17th century. <a class="more-profile" href="/about">Read More</a></p> </span></div></center>
- Change Image Url with yours URL link and text with your text.
6. How To Set Date On Post
Go to Blogger Dashboard > Settings > Language and Formatting > Formatting > Timestamp Format > set it to date instead of time
Save it
7. Instagram Widget

1. Go to Blogger Dashboard > Layout > Instagram widget > click on edit button > Edit Html
2. Now copy the below mention code and paste into widget.
3. Now you need to create your access token
<div class='insta-wrap'>
<div class='my-insta-box'>
<a class='btn-style' href='//instagram.com/xposetheme' rel='me'>FOLLOW ME @INSTAGRAM</a>
</div>
</div>
<div id='instafeed'/>


<script type='text/javascript'>//<![CDATA[

var feed = new Instafeed({
 get: 'user',
 userId: 10008029,
  limit:16,
  sortBy:'random',
accessToken: '1531863919.1677ed0.23d238bc564249e799095d060c750218',
template: '<li><a href="{{link}}" target="_blank"><img src="{{image}}" /><div class="insta-likes"><div style="display: table; vertical-align: middle; height: 100%; width: 100%;"><span style="display: table-cell; vertical-align: middle; height: 100%; width: 100%;">{{likes}} <i class="fa fa-heart"></i><br/>{{comments}} <i class="fa fa-comment"></i></span></div></div></a></li>',
 resolution: 'standard_resolution'
 });
 feed.run();


//]]>
</script></div>
you need access token for instagram widget to work Go to this url-> Click here to Generate access token
| Note | |
| Generate Access Token | you need access token for instagram widget to work Go to this url-> http://instagram.pixelunion.net/
Generate access token |
| Sign In and Follow the steps | Then You’ll be given an access token like this 1531863919.1677ed0.23d238bc564249e799095d060c750218 |
| Follow The next step | Add Instagram User ID: |
8. Customizer – Change The Color And Font Of The Template (Only Avialabel In Premium Version)
Go to Blogger Dashboard > Template > Customize
Now Click on Advance > Main color -> change color according to your need and then press apply button.
9. Mobile Version ( Responsive Design Option )
Mobile Responsive
After you apply mobile version for this template, Color changing option will not work. This is official bug of Blogger. So, please make sure, you used Color changing option before do this step.
As default, Blogger will use its own template for you blog on mobile. So if you want to use Fashion template on mobile devices, please enable it first.
Access your Template menu and click on Gear button of Mobile template.
In Choose mobile template window, check “No. Show desktop template on mobile devices.” option, then click Save button.
The post Trendy Minimal Blogger Template Documentation appeared first on Beautiful Feminine Blogger Templates for Women.
]]>